Just Add Ink #581 | legs

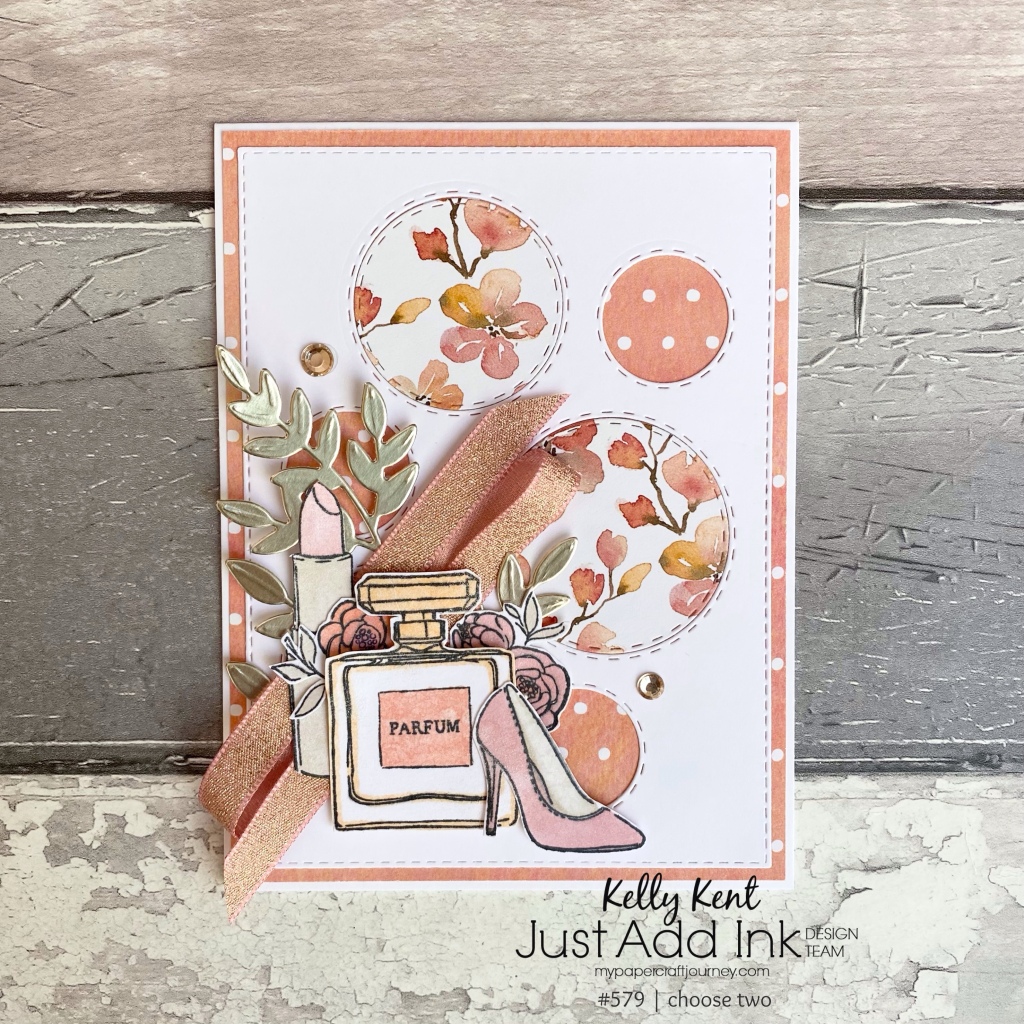
What a cracker of a theme we have for you this week at Just Add Ink. It’s so brilliant, I can’t believe we haven’t done it before – Just Add … “legs”! Thanks Lou for the great inspiration! There’s so many options – lots of legs (like on a spider), regular legs on an animal, people legs or maybe table legs!

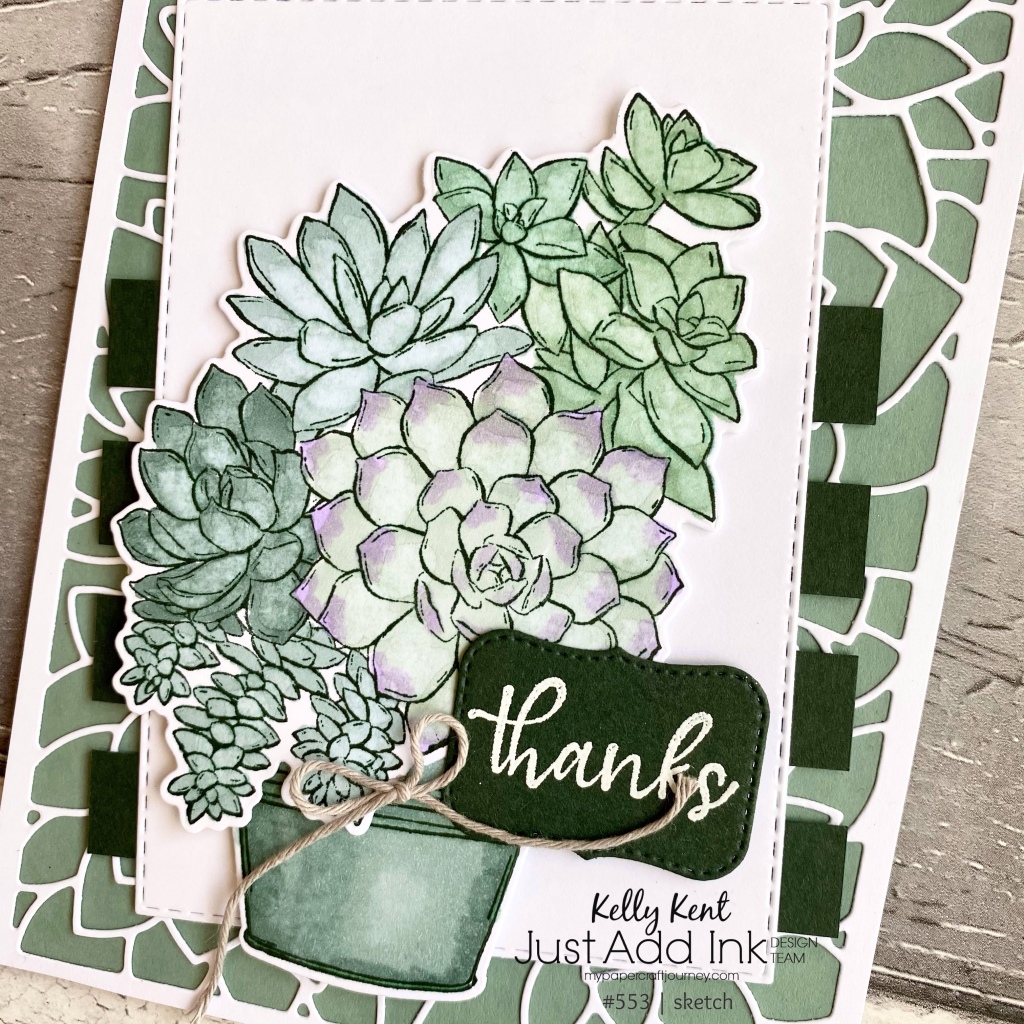
I must admit, I’ve been a little (well, quite a lot) slow going this year for Christmas cards, so I felt it was time to let the inspiration motivate some festive creativity.

Reindeer are my favourite Christmas motif, which work out well as there is always a fun reindeer option in the July-December catalogue.

The Deer Builder Punch punches out the sweetest prancing reindeers – and if you are as good at collecting (… hoarding) paper as I am, you may also have the gorgeous Peaceful Prints DSP from the Sale-A-Bration catalogue that ran in conjunction with the mini catty earlier in the year.

The punch can be used to cut out the reindeer facing right, but it only cuts one way, so the reindeer facing other way needs to be cut by hand. Sometimes you can see through the DSP when you hold it up to the light and cut that way, but these deer are backed by a very solid red & black checkered print. So.. I used the negative to line up where the outline would be, tacked it in place with removable tape and the fussy cut around the reindeer, using the negative punched image as a guide. It worked so well that I’m not sure I’d be able to tell which one was punched and which was was cut!

We’d love for you to join us for this challenge with us and share your ‘leggy’ projects in the gallery. Visit the Just Add Ink blog to up load your creation.

Happy crafting!

kelly kent | mypapercraftjourney.com

Just Add Ink #579 | choose two

It’s a sparkly theme this week for our Choose Two challenge at Just Add Ink. Will it be foil, glimmer or shimmer for your masterpiece?

This was another Choose Two challenge where I could have chosen all three! I ended up settling on foil and shimmer elements.

I wanted lots of layers and frills in this card – it’s for a special birthday recipient. It’s always a tiny bit of extra pressure when you’re making a card for someone who makes cards themselves!

Products:
– Picture This Dies
– You’re a Peach DSP
– Dressed to Impress stamp set
– Forever Flourishing Dies
– Frost White Shimmer Paint
– Blushing Bride Metallic Ribbon
– Stampin’ Blends
– Love You Always Foil

Please share your bling project made using two of the options (foil, shimmer, glimmer) with us on the Just Add Ink blog to join the challenge. We love seeing what you create and choose one winner and two honourable mentions each challenge.

Have a great weekend! I hope it involves good weather, good crafting or both!!!

Just Add Ink #575 | colour combination

Hello! How’s your week been? It’s school holidays here in WA and we’ve just returned from a glorious holiday in Denmark – about 4 hours from our home in Bunbury. We stayed at a caravan park with a fantastic kids playground and jumping pillow – the main requisite for the mini Papercrafts!

It’s time for another Just Add Ink post – this week it’s a colour combination.

These colours are made to go together with the brightness of the Polished Pink and sweetness of the Soft Succulent with gorgeous gold accents. It was a good push for me to use one of the brighter pinks – as I tend to stay with the softer pink tones.

I made a card for one of our design team members who has, after many years of being part of the JAI team, stepped back from stamping for a while.

I love the Handmade for You stamp set and it’s suitability for my crafty friends! I’ve paired the “Craft Queen” sentiment with a greeting from the Sweet Farewell stamp set.

The flourish in the background was made using the watercolour stamp from the Artistically Inked stamp set. To make it gold, I stamped in Versamark, covered in Heat & Stick powder – melted with my heat tool and then quickly layered with Gilded Leaf flakes. I removed the excess with a dry Stampin’ Sponge and the effect left by the watercolour style stamp is magical!

The finishing touches were some Polished Pink and gold gems. I can’t get enough of gems on cards at the moment! What’s your current crafting love? Can you work it into a project using a pink-green-gold theme? We’d love for you to share it with us on the Just Add Ink gallery. Click here to visit the JAI blog.

Have a lovely weekend!

Just Add Ink #573 | sketch

Hello! It’s been a wonderful break but I’m excited to be back to sharing on my blog and Instagram again. I’m going to continue to do most of my sharing via Insta – so jump over there to follow for all the cards I share!

It’s fitting that my first blog post back after my break is a Just Add Ink challenge – they are my favourite inspiration! Today it’s a sketch – a great weekend crafty adventure!

I made my first Christmas card of the season using my favourite suite – Whimsy & Wonder.

How cute are those trees! “‘Tis the season” is from the Christmas to Remember stamp set.

If you make a project using our sketch as the inspiration, share it with us on the Just Add Ink gallery – click here to visit the blog.

Have a wonderful weekend,

Just Add Ink #553 | sketch

Hello! I’m excited to be creating tonight with the Just Add Ink Design Team for challenge #553 – a sketch I designed for the team. They’ve knocked it out of the park – the creations are beautiful!

We can’t wait to see what you do with the sketch! You can join the challenge over at the Just Add Ink blog by adding your card to the gallery.

When I looked at this sketch again to make a project, it seemed better on its side. Lots of the design team agreed with me, so you’ll see lots of portrait styles on the JAI blog. You are welcome to adapt the sketch to suit your creativity – as long as you keep the main elements / structure.

I used the front panel and the strips to frame my succulent creation.

You’ll find the Simply Succulent bundle in the Jan-June 2021 Mini Catalogue. Not only does it come with succulent stamps and dies, but you also get the amazing cover plate die you see in the background of my card. Such amazing value and so many options for ways to use this bundle.

I’ve stamped the succulents in Evening Evergreen and coloured with Stampin’ Blends – Soft Succulent, Just Jade, Mint Macaron and Highland Heather. The cardstock colours for the card are Soft Succulent, Evening Evergreen and Basic White. I am enjoying the green duo in the new In Colors – Soft Succulent is so dreamy and Evening Evergreen is a fabulous contrast.

Is this bundle part of your collection or on your wish list? It’s one of the many carryover products that made it to the 2021-2022 Annual Catalogue, so we’ll be able to enjoy this bundle for the next year.

You can shop online for all your Stampin’ Up! needs – both catalogues are available in the online store, open 24-7. Click here to shop.

Have a wonderful weekend. I hope it’s filled with lots of happy!

Just Add Ink #549 | Choose Two

It’s a Choose Two theme for Just Add Ink this week, and you have me to thank – or curse – for the choices!

I love the boho look of flowers with feathers! I must admit there was a component of challenge in leaving the leaves out, so that I just had two of the choose two elements. In the end I worked around it by using the feathers as the foliage.

The featured stamp set for this card is Beautiful Friendship. This is currently on the Last Chance Retirement List and will retire on 3rd May 2021 – or when supplies run out in the warehouse. These flowers are so wonderfully whimsy!

The feathers are from two other stamp sets – Tasteful Touches and Positive Thoughts. They’ve been getting a bit of workout lately – I’ve been loving incorporating feathers into my designs.

The colours for this card are Sahara Sand for the base, Rococo Rose (from the Sand & Sea DSP) for the background and Basic White with Subtle Embossing for the panels. The florals are Blushing Bride, Rococo Rose, Pool Party and Highland Heather. The feathers are Pretty Peacock, Bermuda Bay, Early Espresso and Crumb Cake. The accessories are White Polka Dot Ribbon, Blushing Bride Metallic Ribbon and Elegant Faceted Gems.

I can’t wait to see all the floral entries for this challenge. I know there’ll be lots of petals and leaves, but I’m excited to see what leaves & feathers and petals & feathers creations you’ll share. To add your project to the gallery, visit the Just Add Ink blog by clicking here. You can also see all the ways the design team used the leaves, feathers & petals.

Thanks for supporting Just Add Ink – we really appreciate you all!

Just Add Ink #543 | sketch

Hello! Thanks for stopping in for today’s Just Add Ink challenge. It’s a sketch theme – one that I know you’ll love! This would work for a card, scrapbook page or mixed media project. I can’t wait to see what you come up with!

To enter the challenge, please visit the Just Add Ink blog and add your creation to the gallery. You can also see how the rest of the JAI design team used the sketch for inspiration.

I thought the layout of this sketch worked well to show off some of the patterns in the Whale of a Time DSP as a whole sheet – using the tiled effect to add texture.

For the turtle card, I rotated the sketch to go with the layout of the swimming turtles.

The sentiment is from the Seaside Notions stamp set, cut out with a Stitched Rectangle Die. I added in a fussy cut turtle from another sheet in the pack and finished it all off with white twine from the Snail Mail twine combo pack.

The second card uses more stamps from the Seaside notions stamp set – which coordinates beautifully with this DSP.

The seahorse was stamped in Versamark on Pretty Peacock cardstock and then heat embossed in white. And then fussy cut! I don’t mind fussy cutting, so I know some crafters that would like a die for everything!

Thanks for visiting today, I hope you have a marvellous weekend.

Just Add Ink #541 | Blended Background

Hey there, thanks for joining me for another Just Add Ink challenge. I’ve said it before and I’ll say it again, it’s the variety in the Just Add Ink challenges that I love so much.

Today’s challenge is to add a Blended Background. I can’t wait to see how everyone does this – brushes, daubers, sponge rollers, ink pads…. this technique has lots of ways to reach your end point. I used the new Stamping Brushes by Stampin’ Up!. These makeup style brushes make seamless blending so easy. To help, I used Shimmery White cardstock with its ultra smooth surface and beautiful shimmer to help blend the colours.

Dragonfly Garden | kelly kent

Before applying the ink, I stamped the wildflowers from the Dragonfly Garden stamp set in Versamark and added Clear Embossing Powder. This is the Emboss Resist Technique and always a favourite when working with blended backgrounds. It means when you rub the ink over the cardstock, it doesn’t take up ink where the clear embossing is and that part remains whatever colour your background started (in this case white).

Dragonfly Garden | kelly kent

The colours I used for the ink blending are Daffodil Delight, Magenta Madness and Gorgeous Grape. I really wanted the colours to be bright and fun for this get well card.

Dragonfly Garden | kelly kent

I always like to balance the bright colours with black and white contrast. The dragonfly and the sentiment are white heat embossed on Basic Black cardstock. The get well soon sentiment is from the Blossoms in Bloom stamp set. It’s often my go to because I love the font and it’s got really sensible sayings that you want to put on the front of cards.

We’d love to see your blended background projects. Please share your creation in the gallery on the Just Add Ink blog to join in the challenge. You can also see the other design team cards for colour & design ideas with ink blending.

Have a great weekend!

kelly kent | mypapercraftjourney.com

Just Add Ink #539 | Choose Two

After a fabulous blog hop earlier in the month, we are back to the regular cycle of Just Add Ink challenges. Today’s “Choose Two” challenge, selected by Di, gives you frames, banners and bow to choose from. Honestly, I could have crafted with all three of these!!!

I made two cards for this theme, with very similar layouts. As soon as I started thinking about this Choose Two challenge, it all came together quite easily. I’ve used the Stitched Rectangle Dies frame as a border for my card and added Banner Pick a Punch banners to the top left corner. I love both of these elements and it’s a layout I regularly pull out. I had to stop myself from adding a bow to the banner!!!

Kangaroo & Company | kelly kent

This was my first play with the Kangaroo & Company stamp set and the coordinating Kangaroo Dies. Can I just say – I’m in love! The kangaroo stamps so beautifully and is so easy to colour. The extra pieces are the perfect size and provide great accessories for the sweet kangaroo. And everything you can stamp can be cut out with the Kangaroo Dies!

HELLO BABY

Kangaroo & Company | kelly kent

This card has the baby kangaroo in the Mumma’s pouch. When you die cut the big kangaroo, it cuts across the top of the pouch so you can slide the builder pieces in there. So cool!!! You can also add a message to the tag that slides in and out but I’ve left it plain and just have the novelty of the baby jumping out for some fun!

Kangaroo & Company | kelly kent

The DSP for these creations is the Hydrangea Hill DSP. It’s so pretty! It helps that the colours are some of my favourites to craft with! The hello baby card has tones of Rococo Rose and Blushing Bride, with a Crumb Cake coloured kanga. The sentiment was cut using a heart die from the Be Mine Stitched Dies.

JUST HOPPING BY

Kangaroo & Company | kelly kent

The second card uses more of the Hydrangea Hill DSP – this time in blue & purple tones with a Smoky Slate kangaroo.

Kangaroo & Company | kelly kent

The pouch is covered by the pretty floral bouquet coloured in Highland Heather, Seaside Spray and Old Olive Stampin’ Blends. The sentiment on this card was cut using a starburst style circle die from the Tasteful Label Dies.


Do you have a favourite layout that you love to return to? Sometimes a good layout is all you need to start that creative process and get you on the way to a gorgeous card!

To see more of the design team’s projects for this challenge, jump on over to the Just Add Ink blog. You can also join the challenge there and share your “Choose Two” project on our gallery.

Have a wonderful weekend!

kelly kent | mypapercraftjourney.com

Wrapped Bouquet

Hello! Although craft time has been somewhat limited during our very busy school holidays, I carved out a little time yesterday while the Mini Papercrafts

There’s two points of easy inspiration for me when I’m sort on time to explore the creative journey – CASEing a card and using a challenge. These cards ended up being a combination of the two.

CASEing the Catty Challenge #302 was to CASE a floral project and Just Add Ink #538 had a brilliant sketch.

So with those two sources of inspiration and a handful of new products at my fingertips, I decided on getting the new Wrapped Bouquet bundle inky.

Here’s the catalogue inspiration photo from the Wrapped Bouquet page…

Using the layouts, styling and DSP patterns from the inspiration photos, and keeping the Wrapped Bouquet bundle as the centrepiece, these are my versions –

Wrapped Bouquet | kelly kent

You can see that I changed just enough of the design to make it my own, but used enough of the inspiration samples to make designing cards while on limited crafting time easy & pleasant.

For the first card (top left), I changed up the background to match the Just Add Ink inspiration photo – moving the black & white squared DSP from a whole background to smaller rectangle and then adding in another one using the same DSP pattern as used in the other sample. These DSPs are both from the Well Suited DSP.

Wrapped Bouquet | kelly kent

I chose a one tone colour palette on each card to go with the neutrals (black, white, grey) as the pop of colour. This card is Blushing Bride and Rococo Rose – I seem to be on a pink run at the moment!

Wrapped Bouquet | kelly kent

This bouquet from the stamp set is my favourite of the two, so I used on both cards, but there is another floral bouquet option. The Wrapped Bouquet stamp set coordinates with the Wrapped Flowers Dies which cuts out the whole stamp perfectly. There’s also a die in the set which cuts out a rectangle with crease lines to turn it into the paper for the bottom of the bouquet, but the stamped version was cute, so I’ll save that for another project.


The second card uses the layout of the catalogue card (bottom right), with a different colour palette. I love a good layout and this one was too good to mess with so I changed up the colours. Mint flowers – yes please!!!

Wrapped Bouquet | kelly kent

In keeping with my mesh of the two catalogue cards, I’ve included the black & white squared DSP for one of the strips. The other is Mint Macaron. as well as Pretty Peacock for the tag and Soft Sea Foam for the leaves – in keeping with a one tone pop of colour. The flowers are coloured with Soft Sea Foam & Mint Macaron Stampin’ Blends.

Wrapped Bouquet | kelly kent

Want to join in with either of these challenges? You’ll find CASEing the Catty on Facebook and Just Add Ink via their blog.

The magic question for the rest of the week – will I get any more time at the craft table??? There’s only a few more days of school holidays here in Western Australia and then summer break is over. We’ll be back to early morning wake ups, packed lunches and some sort of a routine! As much as I’ve missed getting inky, I’ve loved having the kids home and getting out and about every day! Why can’t we have it all??? 🙂

kelly kent | mypapercraftjourney.com