Social Stamping | thank you from kelly

Hi there, and thanks for stopping by for the second installment of Social Stamping.  I’m hopping with my stamping friends – so that we can share with you and all stay connected during the global lockdown period.

You can see a full list of all the designers participating in this blog host by clicking here.

The theme today is thank you.  And it’s a big thank you.  One that extends to everyone playing their part in the COVID-19 pandemic.  From the front line heroes who are manning the shops, educating our children or saving the sick, to the at home hereos who are continuing essential businesses while in social isolation or raising their family within the boundaries of their home.  Staying at home at the moment where possible is just as essential as going out to work.  We all have a part to play to move forward from our pandemic state to putting COVID-19 in the history books.

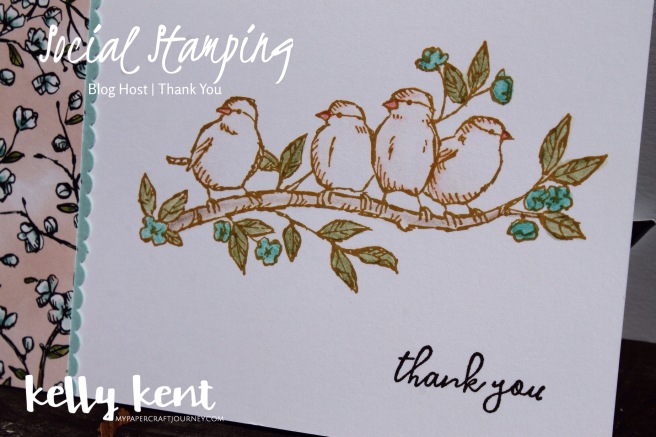
My card was made for a staff member at our local farmer’s market.  She had such a lovely disposition, beautiful words during our checkout chat and made such an impact on me during our short interaction.  It takes all levels of kindness and compassion during this time and she was a wonderful ambassador for the retail industry.  Until now, I’d never considered what a luxury it is to have an endless supply of food with easy access.  I am grateful to still be able to access fresh food and to the people who make this possible.

I could make a hundred of these cards and still not reach out to all the people that deserve them.  But I figure, if we can each spread some gratitude and say thank you to individuals that have made a difference, the ripple effect of this can be profound.

Social Stamping thank you | kelly kent

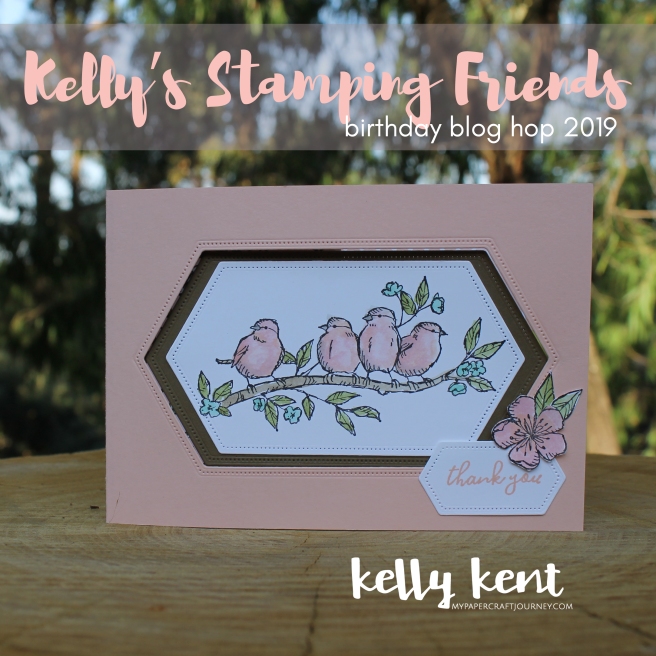
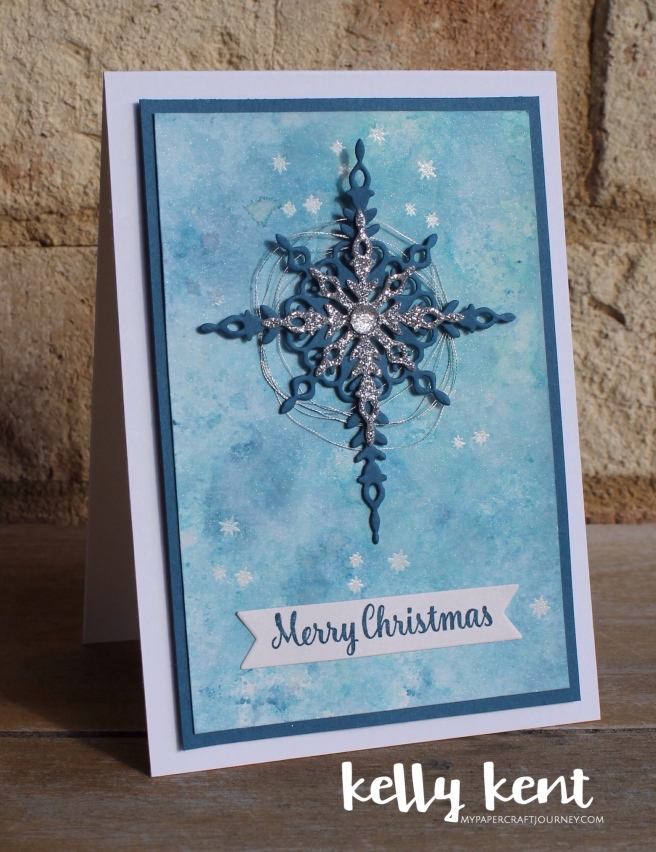
My card is a simple layout featuring both pretty DSP and simple stamping.  The Bird Ballad suite is from the Annual Catalogue.  This is current until 1st June 2020, but with supply chain uncertainty it’s possible that some products may sell out before this time and become unorderable.  If you have any favourites, I suggest adding them to an order sooner rather than later.

DSP: Bird Ballad
Stamp Set: Free As A Bird
Punch: Decorative Border Ribbon
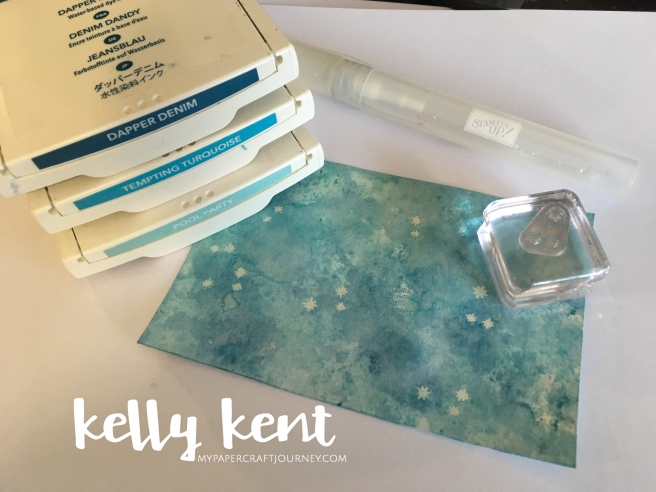
Ink: StazOn Saddle Brown, Memento Tuxedo Black, Early Espresso Classic
Colouring: Watercolor Pencils, Aqua Painter, Stampin’ Blends, Wink of Stella
Colours: Whisper White, Pool Party

Social Stamping thank you | kelly kent

I almost always colour with Blends now, so it was nice to use the Saddle Brown StazOn ink with watercolour pencils for a softer look.  The sentiment is stamped in Early Espresso.  This is my go-to ink option for cards that coordinate with brown tones – it provides excellent coverage and easy stamping.  I love my blacks, but they can be a bit more high maintenance to get a good image on the first stamping.

Social Stamping thank you | kelly kent

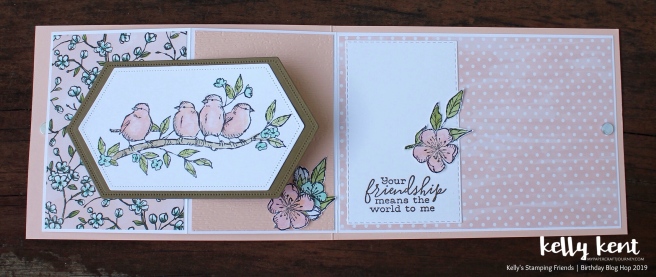
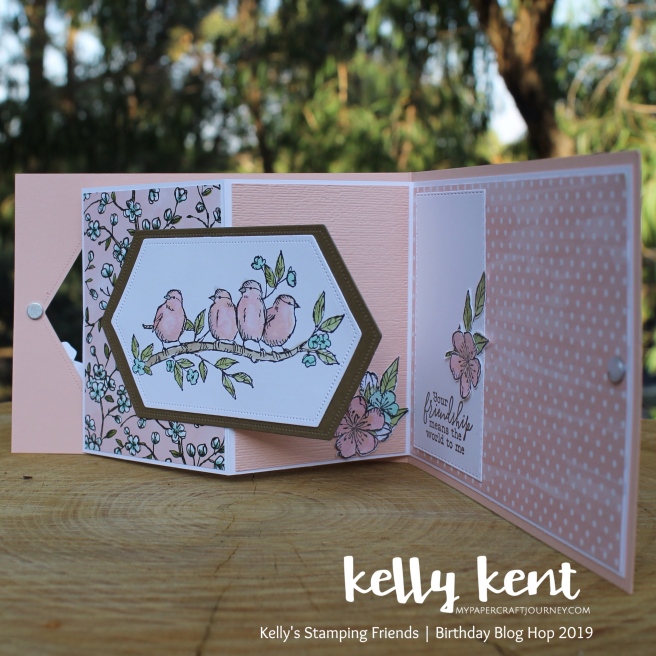
I decorated the inside of this card with as much care as the outside.  I always think that adds a little extra love.  I carried through the DSP strip and then added a 2 layer mat (Pool Party & Whisper White) before embellishing with fussy cut flowers, another sentiment and some pearls.

Social Stamping thank you | kelly kent

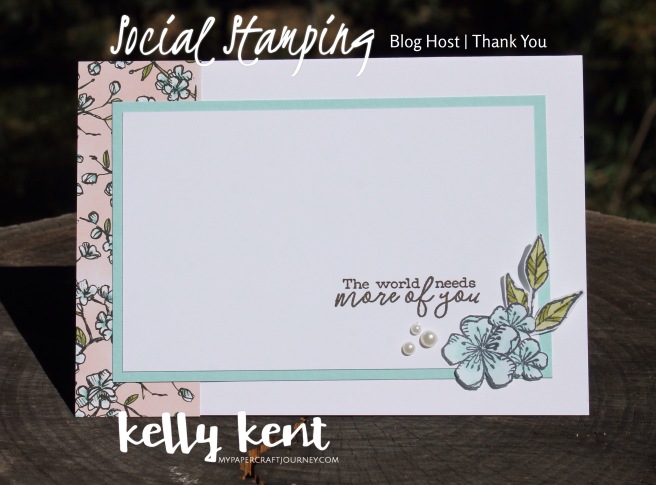
The sentiments from this set couldn’t be more perfect for my thank you card!  And the font is so pretty!!  These flowers are coloured with Blends (stamped with Memento ink).

Social Stamping thank you | kelly kent

It can seem a little difficult to remember which ink goes with which colouring method, but once you understand that they need to be opposites, it’s much easier.  Stampin’ Blends are alcohol, so they need the water based Memento ink.  StazOn is alcohol based, so it’s suitable for water colouring (such as the Aqua Painter over Watercolour Pencils).

Social Stamping thank you | kelly kent

One last thank you left – and that’s to all the designers who joined me for this hop and all the crafters who visited.

You can see all the participants via the main blog post (click here) or you can click through to the next blog by Nicole Wilson.


Thanks for hopping with us,

Kelly’s Stamping Friends | Birthday Blog Hop 2019

No photo description available.

Happy Birthday to me!  Tomorrow is my special day and to celebrate, it’s become a bit of a tradition (we’re in our third year) of gathering my stamping friends and having a blog hop.

I’m joined by 23 of the sweetest, most talented stampers that the South Pacific has to offer.  Enjoy the project from each creator and then click on next to hop through to the next project.  The hop runs in a circle, so you don’t need to start at any particular point – just keeping scrolling through the beautiful artwork and click on next until you get back to where you started.  If any of the next links are broken (it happens sometimes!), there’s a list of participants at the end of this post.

Seeing as it’s my birthday, there’s a loose birthday theme for tonight’s hop.  But (because it’s my birthday and I can break the rule), I have strayed slightly from that theme and my card is a thank you – a great big thank you to all the designers who have joined me on this hop to celebrate and another big thank you to everyone who visits us!

Free As A Bird Sneak Peek | kelly kent

For this hop, I’m sharing with you some of my new birthday presents.  I love the happy coincidence that my birthday month is also a Stampin’ Up! preorder*** month.  I love gifts – giving gifts, getting gifts, buying myself gifts!  Happy Birthday to me!

***Preorder means a demonstrator can order from a new catalogue or promotion earlier than its release.  Customers will be able to order new items shown on this post from 4th June.  Can’t wait?  Ask me about joining my team.

Free As A Bird Sneak Peek | kelly kent

This card features the new Stampin’ Up! stamp set – Free As a Bird and coordinating dies – Stitched Nested Label Dies.  The stamp set has the most beautiful bird & flowers combination and the dies are a dotted edge – a new pattern for the SU range.  The stitched edge effect creates a fabulous border both inside & out.

Although this card looks pretty on the front, the magic happens when you fold it out.  I’ve combined a couple of ideas to create a Window Front Z Fold Card.  The card front has a Nested Die cut out and the bird panel is actually attached to the Z fold in the middle of the card.

Let me show you more pictures.  Here’s the card when the Z is still folded  but the card front is open.

Free As A Bird Sneak Peek | kelly kent

And then when totally opened out…

Free As A Bird Sneak Peek | kelly kent

I’ve added a couple of little magnets to keep the card closed when it’s all folded back in.

The measurements for this card:

Card Base – 4-1/8″ x 11-11/16″ (half an A4 page lengthways), scored at 5-7/8″

Insert – 3-7/8″ x 11-1/4″, scored at 2-13/16″ & 5-5/8″

DSP (left panel) – 2-11/16″ x 3-3/4″

Cardstock (middle panel) – 2-11/16″ x 3-3/4″

DSP (right panel) – 5-1/2″ x 3-3/4″


I love that those gorgeous birds are a feature inside & out of the card.  I’ve stamped all the images for this card in StazOn ink and coloured them with ink and an Aqua Painter.

Free As A Bird Sneak Peek | kelly kent

The Bird Ballard DSP I’ve used in the card is from the same suite as the stamp set.  These colours helped me to choose the colours for colouring.  The card base is Petal Pink, the Nested Label is Soft Suede and for colouring I’ve used Petal Pink, Blushing Bride, Crumb Cake, Pool Party, Old Olive & Smoky Slate.

Free As A Bird Sneak Peek | kelly kent

As well as the whimsy of the birds and the flowers, I  love the sentiments from this set.  And I thought given all the wonderful friends I have along on this hop with me, the one I’ve chosen for the inside (Your friendship means the world to me) is just perfect!!!

Free As A Bird Sneak Peek | kelly kent

Did I mention how much I love gifts?  I’d like to gift this card and a sampler of the pretty Bird Ballard DSP to someone special.  To be in the running, leave a comment on this blog post and I’ll choose a winner on Tuesday 28th May 2019.


Next up on for the birthday fun is the gorgeous Shannon Kissane.

Image may contain: text

Thank you for hopping us with today and for being part of my birthday celebrations!!!


PARTICIPANT LIST
1 Kelly Kent
2 Shannon Kissane
3 Tina Gillespie
4 Monique Fielder
5 Leonie Stuart
6 Michelle Strazds
7 Mandy Depiazzi 
8 Rochelle Blok 
9 Narelle Simm 
10 Catherine Creer
11 Lou Kitzelman
12 Sandra Collett 
13 Sharon Dalton 
14 Denise Buetler 
15 Siobhan Fitzsimmons
16 Jan McQueen
17 Cathy Pinchbeck
18 Richelle Fletcher 
19 Melissa Gifford 
20 Rachael Lewsley
21 Nicole Wilson
22 Julia Quinn
23 Sheila Pybus
24 Leonie Schroder

Paper Adventures Team Blog Hop | Photo Inspiration

Paper Adventures - Blog Hop Header

Hello, happy Friday!!!

Thanks for joining us for July’s Paper Adventures team hop.

Today the team, along with our guest designer – Sharon Dalton – are using this gorgeous photo by Paper Adventures team member Siobhan Fitzsimmons, to inspire our creativity.

Image may contain: flower, plant, nature, text and outdoor

There was no further instructions – team members could take whatever they liked about this picture and use it for their creative spark.  It could be the colours, the patterns, the nature theme, the bees…… and I can’t wait for you to see what they’ve made.

I used the colours of the flower to inspire a bold watercolour background.  I started with Crushed Curry and blended in Lovely Lipstick before adding some highlights with Real Red ink.  Watercolouring always softens the colours and gives such a lovely effect.

Artfully Folded Watercolour | kelly kent

To replicate the bees, I gold embossed the paper cranes from the Artfully Folded stamp set.  This set is another host exclusive – available only to purchase with Stampin’ Rewards.

The gold embossing is so pretty in the light!

Artfully Folded Watercolour | kelly kent

Thanks for joining us for today’s hop.  There’s a full participant list at the end of this post.  To keep hopping in order, visit my talented friend & teamie (our photographer!) – Siobhan Fitzsimmons.

In case you haven’t seen it, there’s a great joining special in July for all stampers who join our Paper Adventures team – 10 {FREE} full size ink pads (a complete colour collection) when you join.  Starter kits are just $169 – and come with your choice of $235 of Stampin’ Up! products, 20%+ discount until at least January 2019, access to our Paper Adventures team page, early access to the Holiday Catalogue – and more!!

Click here to read more about the July joining special or click here to join!

kelly kent | mypapercraftjourney.com

Participant List:

Product List

Just Add Ink #394 | Romance

There’s nothing like a challenge deadline to raise the bar and get some of my to-do list done early!

Thanks to a fabulous theme of “Romance” by Nikki, it’s full steam ahead on the Valentine’s & anniversary cards required around here in Feb.

Image may contain: text

The first card I made for this challenge was very non-traditional.  I have no idea where the idea started, but I wanted to use the phrase ‘you are my sunshine’.

Just Add Ink #394 Romance | kelly kent

The Sunshine Wishes Thinlits have the cute ‘sunshine’ die, the stamp set has the ‘are my’ and the YOU is from the Sale-A-Bration set called Celebrate You.

Using the Multi-Purpose Adhesive sheets with the words is my favourite way to adhere them to my cards.  No messing around with liquid glue or tiny bits of tape.

Just Add Ink #394 Romance | kelly kent

The background was made by stamping the dandelions from Birthday Celebration in Versamark then heat embossing in white before spritzing and swirling some yellow & gamboge (orange) Brusho Crystal Color.  Add some glitter dots, a coordinating DSP background and my non-conventional romantic card is done.

Fun fact: I bought Brushos just so I’d be able to tell my customers what they are like…. and I can’t stop using them!


After my fun take on romance, I decided I should make a card in a similar style but with a more traditional colour theme and sentiment.

Just Add Ink #394 Romance | kelly kent

This card has a Sunshine Wishes Thinlit (love), Celebrate you Thinlit (YOU) and stamped sentiment (MORE), just like the other card.

Just Add Ink #394 Romance | kelly kent

It also has a Brusho background with cute emboss resist hearts from the Yay You stamp set – but pink Brusho???  It turns out if you add just a tiny tap of the Brilliant Red Brusho, you can achieve a gorgeous soft pink.  So many possibilities!!!

Two cards – one screams romance and one slides up quietly with a romantic gesture.  Do you have a favourite?

Just Add Ink #394 Romance | kelly kent

If you’d like a reason to start you V-Day card making early, or maybe you also have an anniversary in February, or you’ve got a wedding to go to, visit the Just Add Ink blog to join the challenge.

While you’re at the blog, you can see all the design team card – what a talented bunch, not to mention a collective group of some of the nicest people you’ll ever meet!

Thanks for sharing in the crafty fun with us!

kelly kent | mypapercraftjourney.com

Play date with Brushos

Yesterday my gorgeous best friend, Cait, visited for the day.  She’s crazy talented with a sewing machine – see her work here – and loves all crafts.

Since we were on my turf (and I suck at sewing actual projects), we played with paper and watched tennis.

Ready to impress with cool new products, I pulled out the Brusho Crystal Color pots.

Have you seen Brushos before?  They are teeny tiny watercolour ink crystals that react with water to create intense colours & amazing patterns.

Stampin’ Up! is offering a pack of 5 colours – Brilliant Red, Gamboge (orange), Moss Green, Prussian Blue & Yellow.  See them in my online store here.

Watch the Stampin’ Up! video…

You can either mix thoroughly to get a vibrant solid colour or use water spray to spread the crystals and end up with colour separation & patterns.  They blend beautifully – and did I mention the colours???

No two projects will be the same and you’ll end up with a unique design every time.  They don’t actually have a mind of their own – it just seems that way!

There’s one thing I’ve learnt while playing with Brushos…..  they are highly addictive.

But they are also a product that’s different from other colouring mediums we’ve had at Stampin’ Up! before.  Practice makes “perfect”.  You need to get down & messy with Brusho to get a feel for how they work.

Browsing videos, blog posts and tutorials may help if you’re not sure where to start.  You can find the Stamping Sunday tutorial here – full of projects and tips for using Brushos as a beginner.

Today, Cait and I splashed around the water and made a heap of different Brusho samples.  Brusho Techniques | kelly kent

This is not a comprehensive list of what you can do with Brusho – just some ideas to get started.

If you’ve just got your Brushos, I suggest you cut up a piece of Shimmery White cardstock into tag size pieces and get playing.  Our tags measured 2″ x 3-7/8″ (5 x 9cm) – 12 per A4 page.

Shimmery White is durable enough to play but more economical than Watercolour Paper.  It also gives you a nice shimmer through your Brusho colour!!

Here’s each of the techniques in more detail…

Brusho - Baby Wipe | kelly kent

Brusho - Emboss Resist Ombre | kelly kent

Brusho - Emboss Resist | kelly kent

Brusho - Emboss Resist Painting | kelly kent

Brusho - Watercolor Background | kelly kent

Brusho - Custom Watercolor Background | kelly kent

Brusho - Marbled | kelly kent

Brusho - dry application | kelly kent

Quite a lot of the magic of Brusho is in the finished product – once the colour has settled, once it’s dry.  Sometimes you need to walk away and come back later to see the amazing!!!

If you haven’t yet purchased Brushos, you can buy them in my online store. 

Other supplies you may need…. 

Happy inky fun ahead for Brusho owners!
kelly kent | mypapercraftjourney.com

TGIF – Emboss Resist Challenge

Good afternoon!  Here is Bunbury, Western Australia it’s cold & wet.  Perfect weather for crafting!!!

While scrolling through Facebook, I saw this gorgeous card by Chloe Evans.  So pretty & inspiring!!

I’m so pleased to be able to call Chloe a friend of mine!!   We both contribute to several shared design teams, and also to some other ones.

One of Chloe’s DT roles is with TGIF – a challenge I’ve often admired, but never jumped in to join the fun!

This week I am!!!  The theme for TGIF#118 is Emboss Resist – a technique I love!

I’ve combined it with another technique I’m currently in love with – ink “smooshing” (or smooching).

This has been floating around for a while and I wish I was quicker on the uptake (we know I’m not though!!!) – because it’s the easiest and most effective watercolouring I’ve ever done.

And for someone that’s had more watercolour fails than successes along the way, it’s like finding an inky oasis in the desert!!!

TGIF #118 Emboss Resist | kelly kent

To get the emboss resist effect, I stamped the trio of stars on the background of Shimmery White cardstock in Versamark, the embossed in clear.  This meant I could “smoosh” as much ink on as I wanted and it wouldn’t take the colour in those places.

There’s lots of tutorials on smooshing – I loved this one by another stamping friend, Jenny Hall.

If you’re adding more than one colour, you need to make sure to allow dry time (or for the impatient crafter like me, help it along with the low setting on your heat tool) between each colour, or they’ll run into each other and ruin your effect!

For this project I used Pool Party, Tempting Turquoise & Dapper Denim.

Lots of plastic surfaces work to transfer the ink, but cello bags were a great option for me!

Ink Smooshing | kelly kent


This photo of the star centrepiece also shows up the smooshing colour variation and the embossed stars.

TGIF #118 Emboss Resist | kelly kent

I didn’t purposely set out to make a Christmas card for this challenge, but the last weekend in July seems like a fitting time for one final Christmas in July card!

I do love the Star of Light stamp set – and I’m so glad it appeared in the Annual Catalogue.

TGIF #118 Emboss Resist | kelly kent


If you’re ready for some new Christmas stamps, you are going to {LOVE} the upcoming Holiday Catalogues.  Demonstrators got a sneak peak during the week – and there’s lots of excitement!!!

If you can’t wait til September to see & buy Christmas stamps, you might want to take advantage of the July joining special and join my Paper Adventures team.

The cost for your amazing Stampin’ Up! Starter Kit is $169.  This will land on your doorstep (with free shipping):

  • $235 of your choice of Stampin’ Up! products
  • $187 of Christmas in July extras (snips, blocks, adhesive, grid paper, bone folder & Carols of Christmas stamp set)
  • a pack of Stampin’ Up! extras including some catalogues & order forms (just in case you want them – no need to sell to anyone other than yourself if that’s what you choose)

You’ll also get:

  • immediate access to the online version of the upcoming Holiday Catalogue
  • option to pre-order Holiday Catalogue items as of 1st August
  • 20% discount on anything you buy, or 20% commission on any orders you take
  • access to our Paper Adventures Facebook team page, plus invites to participate in team meetings, blog hops & challenges
  • the opportunity to stay as a Stampin’ Up! demonstrator until {at least} January 31, 2018.

If you have any questions about Stampin’ Up! or joining this great company, please get in touch with me so I can provide the answers!

There’s never a bad time to join Stampin’ Up!, but if you want all the extras that are included for Christmas in July, you have just over 2 days to join.

Ready to go?  Click here to join using the online portal.

I’d love to welcome you to our Stampin’ Up! team!  It’ll be such a wonderful experience, you’ll wonder why you didn’t do it sooner!

kelly kent | mypapercraftjourney.com


Product List

Heat Tool

$50.00

Stamp Review Crew – Host Set Bonus Hop

SRC - Host Set Banner

Hello Long Weekend Monday!

And welcome to a bonus Stamp Review Crew blog hop featuring sets from the Host section of the current catalogues.

Host Sets can be purchased at special pricing using your rewards from any qualifying workshop or order ($250+ in Australia).

Want to know more?  Ask me – or your local demonstrator – to help you earn Stampin’ Rewards.

SRC - Host Set Collage

You are once again travelling around the world for a whirlwind of inspiration!

At the moment, you are in Bunbury, Western Australia.

If you get lost along the way (usually because there’s a broken link), click on the banner at the top of this post to take you to the full list of participants.


I have chosen the “Love You Lots” stamp set today – the animals are just so cute!!!

I matched them with some well known nursery rhymes – can you pick them?

(click on the picture to make it bigger)

Stamp Review Crew - Love You Lots Host stamp set. Nursery Rhyme Set. Kelly Kent - mypapercraftjourney.com.

The layout for my card trio is inspired by the sketch from Just Add Ink #330.


How did you go with singing the nursery rhymes???

There’s Hey Dee, Hey Dee Ho, the great big elephant is so slow…

Stamp Review Crew - Love You Lots Host stamp set. Nursery Rhyme set: Hey Dee Ho. Kelly Kent - mypapercraftjourney.com.

3 Blind Mice, see how they run….

Stamp Review Crew - Love You Lots Host stamp set. Nursery Rhyme set: 3 Blind Mice, see how they run. Kelly Kent - mypapercraftjourney.com.

And, Galumph went the little green frog!

Stamp Review Crew - Love You Lots Host stamp set. Nursery Rhyme set: Galump went the little green frog. Kelly Kent - mypapercraftjourney.com.


Each card has it’s nursery rhyme printed on the back!

Stamp Review Crew - Love You Lots Host stamp set. Nursery Rhyme Set. Kelly Kent - mypapercraftjourney.com

Thanks for joining me! I hope you enjoyed my nursery rhyme cards.

Did you have a favourite?  Was it because of the rhyme or card???  I love them all but always have a soft spot for elephants.

I think they make a fun change for a baby or children’s birthday card!


Next blog for this hop is the fabulous Rochelle – you’ll love what she’s made.  Click next to visit her.

You can also go backward if you’d like to travel from here to Betty’s blog and see the great project she shared.

SRC - Host Set Previous        SRC - Host Set Next

Kelly Kent - mypapercraftjourney.com


Product List

Stamp Review Crew – Foxy Friends

Src Foxy Friends Banner

Welcome to my final blog hop for the week – what a treat to be able to take on you on so many adventures!

Today you’re hopping around the world for the Stamp Review Crew with lots of fabulous creations with the Foxy Friends stamp set.  Plus some great ideas for using the coordinating punch!


As I often do, I’ve used this hop as a chance to extend my concept of the stamp set.

It makes cheeky foxes, cute cats, sneaky skunks, racous reindeers & many more animals!!!

But … for my project, I’ve used the embellishments that coordinate with the foxy animals to create a trio of watercolour notecards.

Stamp Review Crew - Foxy Friends stamp set. Watercolour Notecard Set. Kelly Kent - mypapercraftjourney.com.

I love having ‘blank’ cards on hand for when you need a card quickly!  The embellishment stamps in the Foxy Friends set provide great all-occasion decoration!

I added the medium swirl from the Swirly Scribbles Thinlits set (I haven’t used this in a while & I was missing it!), the love heart speech bubble (this could say anything!) and a few pearls to finish it off.

FLIRTY FLAMINGO…

Stamp Review Crew - Foxy Friends stamp set. Watercolour Notecard - Flirty Flamingo. Kelly Kent - mypapercraftjourney.com.

PEEKABOO PEACH…

Stamp Review Crew - Foxy Friends stamp set. Watercolour Notecard - Peekaboo Peach. Kelly Kent - mypapercraftjourney.com.

EMERALD ENVY…

Stamp Review Crew - Foxy Friends stamp set. Watercolour Notecard - Emerald Envy. Kelly Kent - mypapercraftjourney.com.

I even decorated the envelopes for these cards in matching patterns/colours.

I can’t wait to send one in the mail – it’ll look so pretty!


Thanks for hopping with me!  Next you’re over to Tanya in the US who always has wonderful & colourful creations!  Or if you missed out on Holly, then click below to go backwards.

SRC Foxy Friends prev                            SRC Foxy Friends next

If you get lost at any stage, click on the banner at the top of this post to take you back to Stamp Review Crew blog where you’ll find the whole list of us!

Kelly Kent - mypapercraftjourney.com


Product List

Stamp Review Crew – Blended Bloom

Blended Bloom banner

Hello May!!!  I’m excited that my birthday month of celebrations starts with a Stamp Review Crew post.

If you’re unfamiliar with the Stamp Review Crew format – it’s an international hop that highlights the fabulous talents of demonstrators around the world who all make projects using the same stamp set.

You might have already started the journey and been to see Martha in Canada.  Currently, you’re with me in Australia and next you’re off to America to visit Debra!


This month it’s all about the Blended Bloom single wood mount stamp.  Sadly, this beautiful flower is on the retirement list – but that also means you can buy it while stocks last at 20% off retail price.

Blended Bloom is fantastic for colouring practice (I still need lots of that) and lends itself to so many occasions, colours & designs.

Today I’m sharing a Mother’s Day creation with you.  Did you know that Mother’s Day is at different times of the year around the world!?!  In Australia (and the US), we’re spoiling our Mums this Sunday, but Mums in the UK got their special day back in March!  Interested in Mother’s Day activities around the world?  Have a look at this Wikipedia list for all the details!

I love Wikipedia and looking up quirky background information! But back to the craft…

This is my Mother’s Day project set.  It’s all pink & grey which I {LOVE} as a colour combination.

Stamp Review Crew - Blended Bloom Mother's Day Project Set. Kelly Kent - mypapercraftjourney.com.


The card has a beautiful Hardwood Background panel (staying), Little Letters (going) and a Blended Bloom flower coloured with an Aqua Painter.

Stamp Review Crew - Blended Bloom Mother's Day Project Set. Kelly Kent - mypapercraftjourney.com.

Of course, if there’s a pretty flower on my craft table, it’s going to get ‘winked’ (Wink of Stella is staying!).

Stamp Review Crew - Blended Bloom Mother's Day Project Set. Kelly Kent - mypapercraftjourney.com.


The treat box is made using the Gift Bag punch board (staying!). Instead of adding holes to the top for closure as per the instructions, I made tabs top & bottom of my cardstock and added a ‘lapel’ close.

Stamp Review Crew - Blended Bloom Mother's Day Project Set. Kelly Kent - mypapercraftjourney.com.

To make this style of treat bag:

Cut a piece of cardstock to 10″ x 8-1/4″.  I punched & scored as per the instructions for the first long side.  I then rotated 180 degrees and did it again for the second long side (but making sure the panels matched up with what I had already scored).

This gave me 5 panels (2 sides, a front, a back and a tab for sticking together).  I cut all the tabs from the ‘top’ of the bag except the back one which folds down to make the lapel closure.  I then stuck it together on the bottom & side as per the traditional instructions.

Fill with treats, fold down the lapel closure and wrap a ribbon or twine around it to keep it all looking pretty.  I used Smoky Slate thick baker’s twine (going).  And then added another Blended Bloom flower to coordinate the design with my card.


Happy Mother’s Day to all those lucky Mummies out there – I hope the kids or fur babies get organised during the week and spoil you rotten.

I’ll be pre-ordering my own M.Day present tomorrow!!!  At least I {ALWAYS} get what I want!

Next stop is Blended Bloom goodness from Debra.  Click on the ‘next blog’ link below to see what she has created.

Blended Bloom Prev          Blended Bloom Next

If you get lost during the hop, you can always head back to the main page.

Make sure you check back in with me tomorrow – I’ll be sharing something very special ready for the new catalogue coming in June.  If you love being organised, you won’t want to miss it!  Kelly x


Product List

Blended Bloom Wood-Mount Stamp Set

$21.00
WHILE STOCKS LAST

Little Letters Thinlits Die

$49.00
WHILE STOCKS LAST

Smoky Slate Thick Baker’S Twine

$6.25
WHILE STOCKS LAST

Rose Wonder: Two-Tone Watercolouring

My Tuesday class ladies are in love with watercolouring and embossing.  It’s given us all lots of practice!

This month they made a beautiful card using the Rose Wonder stamp set, gold embossing and two-tone watercolouring.

Two-Tone Watercolouring. Rose Wonder stamp set & gold embossing. Kelly Kent - mypapercraftjourney.com.

It was so much fun to colour with Melon Mambo & Pear Pizzazz together with Daffodil Delight to create a rose with beautiful tones & texture.

Two-Tone Watercolouring. Rose Wonder stamp set & gold embossing. Kelly Kent - mypapercraftjourney.com.

It reminds me of the stunning roses in my Dad’s garden. Although, the red ones are still my favourite because they have the most amazing scent!


This technique is very easy…

Emboss the rose with your favourite embossing powder (gold will always be mine!).  Splash on some Daffodil Delight with your Aqua Painter, fill in the spaces with Melon Mambo on the flower & Pear Pizzazz on the leaves (go around… over.. blend – whatever takes your fancy!  Each time you colour this flower it will look slightly different), then go back with more Daffodil Delight if you need to even up the two-tone effect.

Voila!  Oh, and finish your rose with a layer of clear Wink of Stella {if you want to… because it’s pretty!}.


If you want to see my inspiration for this card and a wonderful example of colouring – have a look at Lydia’s absolutely stunning card here.

To my Tuesday ladies – this is what I mean when I say I’m not artistic!  I could never colour like Lydia.  But I do a pretty good job at being creative!  Kelly x
Product List

Heat Tool

$50.00